 Quick Access
 Quick Search
 Get XoXo!
 Login
Login Contact Team

Sector Trasher V1.0B (Tool) by The Silents
 Credits and Features
If you see an error in these credits, please tell us.
 Release Connections
Contained In Packs
| Title | Type | Author | contained as | Year |
 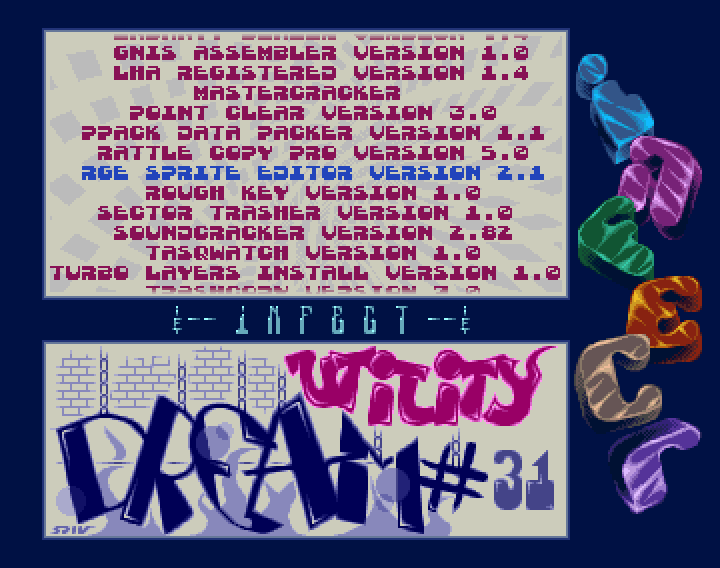 | Utilitydisk |  Infect InfectMarley - Saron - Spiv | ByteKiller 1.3 21924 bytes / crc 60500F91 | a9/92 added 12/18 |
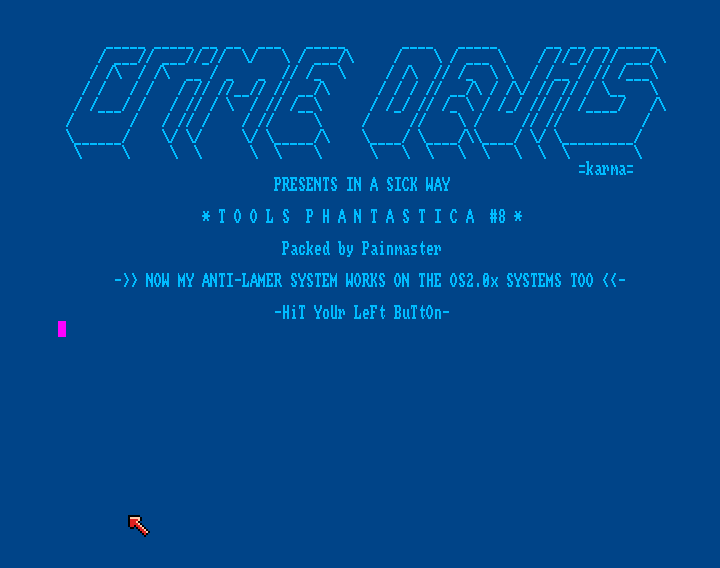 | Utilitydisk no music - virus in source - Cli-Menu Packdisk |  Crime Devils Crime DevilsPainmaster | 4EF9 Linker 19024 bytes / crc 3A066BC4 | a92 added 1/22 |
 Downloads
Direct Files
- Silents-SectorTrasher1.0b (exec), 21924 bytes (ByteKiller 1.3) (CRC:
60500F91
)
 Text Inside this Production
CON:0/0/640/256/ OUTPUT BUFFER
PARENT
DF0:
DF1:
DF2:
DF3:
RAM:
DH0:
DH1:
                         «»DOS-ERROR 218 HAS OCCURED«»                         «»   THE DEVICE HAS NOT    «»      BEEN MOUNTED       «»                         «»                         «»DOS-ERROR 214 HAS OCCURED«»                         «»    THE DISK IS WRITE    «»        PROTECTED        «»                         «»                         «»DOS-ERROR 224 HAS OCCURED«»
... read moredoc
-------------------------------------------------------------------------
- -
- THE SECTOR-TRASHER V1.0 VERY BETA VERSION, (C) 1992 SILENTS DK! -
- -
- CODED BY: THE MASTER / SILENTS DK IN 92 -
- -
- Sector Trasher is a product in the Trash-series, and it is -
- protected under the international © copyright and ® trademark law. -
- -
- -
- MANUAL WRITTEN BY THE MASTER & CYBORG OF SILENTS DK -
- -
- SECTOR-TRASHER V1.0 BETA (C) Copyright 1992 -
- ALL RIGHTS RESERVED MASTER/BIONIC PRODUCTIONS -
- -
-------------------------------------------------------------------------
-------------------------------------------------------------------------
»»»»»»»»»»»»»»»»»»»»»»»»»»»»»» CONTENTS ««««««««««««««««««««««««««««««
-------------------------------------------------------------------------
1. WELCOME TO SECTOR TRASHER V1.0 BETA ............................ 1.00
A. DISCLAIMER................................................. 1.10
B. TRACKDISK.DEVICE........................................... 1.20
C. PREFACE.................................................... 1.30
D. NEW'S SINCE SECTOR TRASHER V0.9B........................... 1.40
E. LOADING SECTOR TRASHER..................................... 1.50
F. SYSTEM LIMITS.............................................. 1.60
G. WARNINGS!.................................................. 1.70
H. LIST OF BETA-TESTERS/HELPERS/IDEA MEN...................... 1.80
I. BOOT-LOADING PROBLEMS AND LIMITS........................... 1.90
J. A SMALL EXAMPLE............................................ 1.95
2. THE MAINSCREEN ................................................. 2.00
A. THE WINDOWS................................................ 2.10
B. THE CURRENT DIR............................................ 2.20
C. THE CURRENT FILE........................................... 2.30
3. THE RIGHT-SIDE GADGETS.......................................... 3.00
A. DRIVE SELECTION............................................ 3.10
B. HOW TO READ FILES.......................................... 3.20
C. HOW TO WRITE SECTORS (CAUTION)............................. 3.40
D. HOW TO WRITE SECTORS USING BITMAP.......................... 3.50
E. WRITE SINGLE BOOTBLOCK-LOADER.............................. 3.60
F. WRITE DOUBLE BOOTBLOCK-LOADER.............................. 3.70
G. ABOUT/EXIT................................................. 3.80
4. THE LEFT-SIDE GADGETS (UPPER AREA(1))........................... 4.00
A. JUMP ADDRESS (1).......................................... 4.10
B. LOAD ADDRESS (1).......................................... 4.20
C. START SECTOR (1).......................................... 4.30
D. TOTAL SECTORS (1).......................................... 4.40
5. THE LEFT-SIDE GADGETS (LOWER AREA(2))............................ 5.00
A. JUMP ADDRESS (2).......................................... 5.10
B. LOAD ADDRESS (2).......................................... 5.20
C. START SECTOR (2).......................................... 5.30
D. TOTAL SECTORS (2).......................................... 5.40
6. THE MESSAGE WINDOW.............................................. 6.00
A. ERROR MESSAGES............................................. 6.10
B. LISTED ERRORS.............................................. 6.20
C. NON LISTED ERRORS.......................................... 6.30
7. COPYRIGHT TERMS................................................. 7.00
A. SUPPORT US................................................. 7.10
B. CONTACT ADDRESS............................................ 7.20
-------------------------------------------------------------------------
»»»»»»»»»»»»»»»»»»»»»»»»»»»»»» CONTENTS ««««««««««««««««««««««««««««««
-------------------------------------------------------------------------
1. WELCOME TO SECTOR TRASHER V1.0 BETA 1.00
-------------------------------------------------------------------------
Welcome to Sector-Trasher, the first real Menu-Controlled sector
operating program.
Why make such a tool? It cannot be used for anything good? can it??
Well of course it can, why should I code it if there was no purpose with
it! The Sector-Trasher is a tool for the ones who is sick of waiting on
the DOS/CLI to load a menu, game, intro Etc. Sector-Trasher can do
the same, but now trackloaded, neat ehh? When your compact is finished
you simply just boot the Sector-Trasher and save your intro or selector
in Sectors to the disk.
I don't know anything about boot-loading or sector writing, you might
think!! Well nevertheless, Sector-Trasher can find the room needed on
the disk (if it is a dos disk!), and it updates your bootblock-data,
and your bitmap!!
This program has a lot of usefull operations, use them well!
SEND IDEAS, AND BUG REPORTS TO ME IF YOU FIND ANY!
1A. DISCLAIMER 1.10
-------------------------------------------------------------------------
Sector-Trasher has been thoroughly tested and is the result of a constant
process of changes and updates that started in July 1992. The program
has proven to be stabel in everyday use. The auther is not responsible
for any loss of data, damage to software or hardware that may result
directly or indirectly from the use of this program.
If you should have any trouble in using this product, we will gladly
give you a helping hand.
If you should discover any bugs while using Sector-Trasher, please
write down how the error occured, and what it was, and mail it to the
address listed at the end of this manual.
1B. TRACKDISK.DEVICE 1.20
-------------------------------------------------------------------------
The "trackdisk.device" is the connection to the disks provided by the
operating system. This is also used by the DOS/CLI. It offers the
ability to acces the disks directly without having to acces hardware
registers.
1C. PREFACE 1.30
-------------------------------------------------------------------------
Sector-Trasher is SHAREWARE, that means that you can copy it freely as
long as you obey by the copyright conditions mentioned in the end of
this manual. If your company wants to use/distribute this product you
can contact Master/Bionic Productions for a special company
agreement.
This product may NOT be used for commercial purposes without written
permission from Master/Bionic Productions.
1D. NEW'S SINCE SECTOR-TRASHER V0.9B 1.40
-------------------------------------------------------------------------
The Sector-Trasher V0.9B, had a few bugs, which should have been
corrected in the Sector-Trasher V0.9B+ and V1.0B.
First of all I have added a few more error-codes so you won't get
the 'Non Listed Error' message every time you try to use the RAM-disk
and the DOS cannot find your Ram.Handler. Now it will give you an error-
code 205, Object not found! If you are trying to load a file which is
protected from reading you should get an errorcode saying that the file
is protected from reading, I have never seen this message but it should
work!
Sector-Trasher V0.9B+ and V1.0B has now got a keyboard snapper/buffer
and it should snap all text, so you won't get a DOS/CLI screen filled
with a lot of shit!
The Sector-Trasher V0.9B+ V1.0B should not have any problems reading
files or directorys with a space in its name, like the older version had!
The RAD:-disk icon has been replaced with a DH1: icon, because no one
uses the RAD-DISK to load a specified program from!
The 'Write Single Bootloader' and 'Write Double Bootloader' function
has now been implemented so you can now use the tool for its purpose!!
Have fun and enjoy it.
1E. LOADING SECTOR TRASHER 1.50
-------------------------------------------------------------------------
To load Sector-Trasher V1.0B, the following things should be observed:
Sector-Trasher is ANTI multi-tasking, meaning that if you are running
another TASK there is a HIGH probabillity that the system will crash if
it uses too much chip ram, or the task is running in the middle of Sector-
Trashers memory area ( This problem should however be corrected in one of
the future version where the sector trasher will allocate its memory).
Sector-Trasher will occupy from $27000 to $7FFFF after decrunching,
so it might be a good idea to RESET or stop all other tasks before
running the Sector-Trasher V1.0B.
Sector-Trasher V1.0B can be loaded from Work-Bench, but we would
incourage you to run it from DOS/CLI.
For futher information, read the "SYSTEM LIMITS" section.
1F. SYSTEM LIMITS 1.60
-------------------------------------------------------------------------
The following limits should be noted when using Sector-Trasher:
- This product is designed to run on any Amiga model and should be able
to do so (WE HOPE, GRIN). It has been tested on these following
Kickstarts, KS1.2, KS1.3, KS2.0.
- Sector-Trasher V1.0B will not run on an Amiga 500+.
- Sector-Trasher requires a minimum of 1Mb ram!
- Sector-Trasher V1.0B Requires the chip memory from address $27000 to
address $7FFFF, a version with own allocater will follow later on...
- This version of Sector-Trasher can only handle files up to 260Kb,
because I have not made the file-space allocater yet!
- Sector operations are limited to the internal drive DF0, but files
can be loaded from various drives.
- Sector-Trasher is non multi-tasking and might crash when trying to do
so, because of its absolute allocation in the chip memory.
- Sector-Trasher has no error checker for the trackdisk operations yet,
it will just inform you that the operation has been performed whether
it was a succes or not!
1G. WARNINGS! 1.70
-------------------------------------------------------------------------
VERY IMPORTANT, TRACKDISK operations can be VERY hazardous to your disks,
if used without caution. When writing sectors to the disk present in
the internal drive you might destroy important data, because sector
operation does not follow the DOS/CLI guidelines, and the sector trasher
DOES NOT warn you before accesing the disk. You should however be able
to avoid this danger by using the "write sectors using bitmap" option.
This function is described later on ( Look in table of Contents ).
1H. LIST OF BETA-TESTERS/HELPERS/IDEA MEN. 1.80
-------------------------------------------------------------------------
I would VERY much like to thank the people helping me with the
devellopment of this software, BETA-TESTERS aswell as people with ideas!
Therefore I will make a list of all the people who has helped me, and who
has given me good ideas for improving this ultimate tool!
I would like to thank these following persons:
BIONIC / THE SILENTS - BETA-TESTER OF SECTOR TRASHER V1.0B
MR. PICO / NANOPOWER - FOR HELPING ME WITH SOME TRACKDISK -
PROBLEMS IN THE S-T V0.9B+.
BIONIC / THE SILENTS - BETA-TESTER OF SECTOR TRASHER V0.9B+
TTM - BETA-TESTER OF SECTOR TRASHER V0.9B III
GROUND ZERO - BETA-TESTER OF SECTOR TRASHER V0.9B II
CYBORG / THE SILENTS - BETA-TESTER OF SECTOR TRASHER V0.9B I
1I. BOOT LOADING PROBLEMS AND LIMITS 1.90
-------------------------------------------------------------------------
If your program does not show you graphics when using sector trasher, try
to add this line at the top of your program: MOVE.W #$83A0,$DFF096 -
this should do the trick and turn on the DMA channels!
When trackloading a program right from the boot sequence the SYSTEM is not
fully active so you cannot load a program like DISKMASTER or DELUXE PAINT,
because they use the SYSTEM!
1J. A SMALL EXAMPLE 1.95
-------------------------------------------------------------------------
To make this docfile more easy to understand I will try to make an example
where I will use the double boot-loader, write-sectors and the write-
sectors using bitmap.
First we need to load the first file into memory, this is done by clicking
on the drive where the disk is in, let's say "DF1" and we then select the
file called xtra_part, this is the file we wish to load when pressing the
right mouse button. Now we press the write-sectors using bitmap, and the
sector trasher now finds the room needed for the file!! Let's say it has
placed the file from sector 300 and 10 sectors forward.
Now the file has been saved and you just write the data to the lower data
area, this is done so you don't have to remeber were the file was saved!!!!
Now the lower and upper area of the data section has the same data.
All you need to do now is to load the main_part and save it on the disk!!!!
You just do like before, select the drive where the file is and load it into
the memory buffer. Now we insert the start sector in the upper section,
let's say sector 1100.
Enter the load address (where the program should be loaded, start of prg),
and the jump address (what address it should jump into to start the program).
Now all data-areas should be filled and you can now press the write double-
boot!! The sector trasher now writes the double-bootloader, and when you boot
the disk normally it will load the MAIN_PART program, and if you hold down the
right button when booting it will load the XTRA_PART instead!!! Quite smart??
2. THE MAIN SCREEN 2.00
-------------------------------------------------------------------------
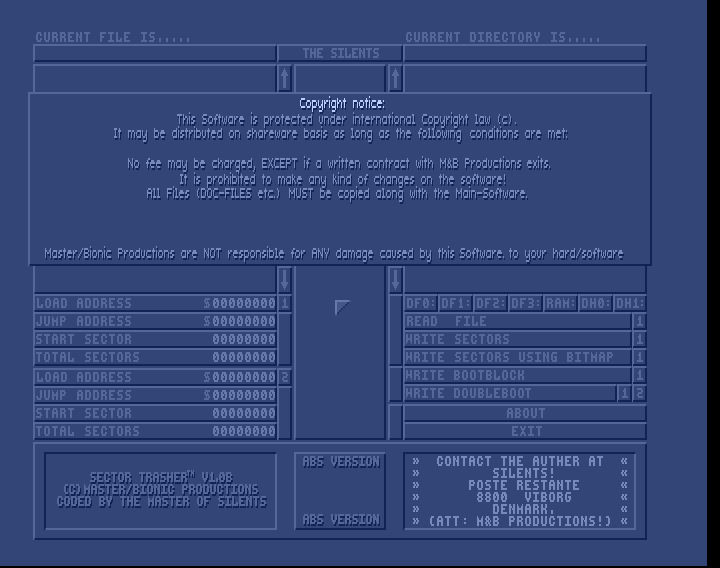
When entering Sector-Trasher V1.0B you will be presented with a screen,
build of 6 main areas.
The first area is the message area, which is placed in the buttom of
the screen. The message area will inform you about most of the action.
The next two areas is the file selecter areas. The window on the left
top-side shows you the files in the current directory, and which file you
have selected!
The window to the right shows you what directorys you can enter and what
directory you are standing in at this very moment!
The lower left side of the screen indicates what the boot-block loader
should use to load and run your trackloaded file(s).
The lower right side is the action area, where you select what drive
you wish to make a directory of, what kind of trackwrite should be uses
and much more.
The middle of the screen is for improvements so therefore it is unused.
You can read a lot more about the windows & gadgest further on in this
manual! ( Look in the table on contents for help )!
2A. THE WINDOWS 2.10
-------------------------------------------------------------------------
The two (REQUESTER) windows is used for file selection. First of all you
have to select a drive (Ex DF0:).
In the right window you should now get a directory block of the
directorys placed in the root. In the left window you should have a list
of all files placed in the root. You can now select a file or a
directory by pressing the name wanted with the left mouse button!
If you select a file it should be shown in the top of the window.
If you select a sub-directory it should be added to the path in the top
of the directory window, and now a new list of files should apear in the
file selection window! Further information can be found in these two
sections 'THE CURRENT DIR' and 'THE CURRENT FILE'.
2B. THE CURRENT DIR 2.20
-------------------------------------------------------------------------
The current dir is the headline of the right-window. It indicates what
directory you are currently standing in, and where the readfile option
should look for the file to load! This text changes ofcourse along with
the directory you enter or leave!
2C. THE CURRENT FILE 2.30
-------------------------------------------------------------------------
The current file is the headline of the left-window. It indicates the
file selected by the user. The headline does not yet indicate whether the
file has been loaded or has just been examined, but this will be improved
when I have the time.
3. THE RIGHT-SIDE GADGETS 3.00
-------------------------------------------------------------------------
The gadgets on the right side could be called the action gadgets! These
gadgets is where you select what you wish Sector-Trasher to do next.
All these functions should be explained in this section!
The right-side gadgets is the DANGEROUS gadgets, because some of them
is accessing the disk without saying so! And the trackdisk does not
look to see if the sector is occupied, except if you use the BITMAP to
check for file space! (Explained later on!)
3A. DRIVE SELECTION 3.10
-------------------------------------------------------------------------
The drive gadgets (under the right window) is only used to select which
drive you wish to load your file from! If your file is on the disk in
drive DF2: simply press the 'DF2' gadget and a directory will pop up in
the right window!
3B. HOW TO READ FILES 3.20
-------------------------------------------------------------------------
To read the file you wish to lay down with the Sector-Trasher, simply
insert the disk in a drive, and press the drive gadget!
You should now get a view of all files, and directorys listed in the
root. Now just select the directory, and the file, and then press the
read-file gadget. The message window should now tell you that the file
has been loaded and you are now ready to write the file to disk!!
If you after reading a file press another filename, another drive or
another directory name the Sector-Trasher will think you have not
loaded a file!
3C. HOW TO WRITE SECTORS (CAUTION) 3.40
-------------------------------------------------------------------------
When using this function be VERY CAREFULL! This function TOTALLY IGNORES
the bitmap and writes the sectors no matter what!
Before pressing the gadget you have to read the file you wish to place
on the disk! The size of the file will be set automaticly when selecting
a file (TOTAL SECTORS (1)).
You now have to enter a valid start-sector/offset! (START SECTOR(1)).
You are now ready to write the sectors to disk, but be WARNED, this
function writes to your disk right where you tell it to!
Except if you try to write in the boot sectors.
3D. HOW TO WRITE SECTORS USING BITMAP 3.50
-------------------------------------------------------------------------
When writing sectors using the disk-bitmap you can be sure that your
DOS files are not destroyed or damaged (If the bitmap is valid)!
This is a great advantage when making trackloaded selectors or menus!
The Sector-Trasher examines the disk-bitmap and finds an empty
start-sector! It uses the TOTAL-SECTORS(1) to hunt for free space,
so the bigger file you wish to write, the more sectors you need!
To use this function all you need to do is to select and read a file, and
then press this gadget, and the Sector-Trasher will do the rest for you,
including the update of you bitmap!
3E. WRITE SINGLE BOOTBLOCK-LOADER 3.60
-------------------------------------------------------------------------
When selecting this gadget, the Sector-Trasher will write a boot-block
loader including the first data block(1).
It Uses these following four data blocks:
LOAD-ADDRESS(1), JUMP-ADDRESS(1), START-SECTOR(1), TOTAL-SECTORS(1)!
These four data strings is explained later on in this manual.
This boot-loader can for an example trackload your Menu or Intro, and
when you then leave your program, you can return to DOS/CLI and execute
the program(s) wanted!
WARNING! Writing this boot-block will destroy the old bootblock.
3F. WRITE DOUBLE BOOTBLOCK-LOADER 3.70
-------------------------------------------------------------------------
This gadget is rather special for the Sector-Trasher! It will write a
boot-loader with two seperate loaders!! The first loader loads like
the SINGLE BOOT-LOADER when you insert the disk! It also uses the same
data-block! The second half of the boot-loader is activated by holding
your right mouse-button down when booting. It uses the second data-block:
LOAD-ADDRESS(2), JUMP-ADDRESS(2), START-SECTOR(2), TOTAL-SECTORS(2)...
That means when you boot the disk normally you will load program one, by
using the first datablock!
When you hold down your right mouse-button on boot it will load your
other program, and this is done by using the second datablock! Remember
to write the second program to the disk in sectors!
WARNING! Writing this boot-block will destroy the old bootblock.
3G. ABOUT/EXIT. 3.80
-------------------------------------------------------------------------
Try clicking the About icon in Sector-Trasher, you will now get a display
of the copyright conditions etc. concerning Sector-Trasher. To exit
about-mode, simply click left mouse button!
To exit Sector-Trasher you must first of all move your mouse to the exit
gadget. Then press both mouse buttons and you will return to DOS/CLI.
All you need to do now is to RESET and check your new trackload creation!
4. THE LEFT-SIDE GADGETS (UPPER AREA(1)) 4.00
-------------------------------------------------------------------------
The left sided gadgets is used to tell the track- loader/saver where to
load/save from and to, and what address it should acces when it is loaded!
Every single area is explained later on in this section!
4A. JUMP ADDRESS (1) 4.10
-------------------------------------------------------------------------
The JUMP-ADDRESS (1) is used to tell the trackloader where to jump to
after loading the program. To enter this address simply press the gadget
and enter your jump address in HEX!
4B. LOAD ADDRESS (1) 4.20
-------------------------------------------------------------------------
The LOAD-ADDRESS (1) tell's the trackloader where the actual sectors
should be read to! This address should indicate the start of your
program and is entered in HEX by pressing the LOAD-ADDRESS (1) gadget!
4C. START SECTOR (1) 4.30
-------------------------------------------------------------------------
The START SECTOR (1) can be typed in manually, or the bitmap-write option
can find a place on the disk for you, and then automaticly insert the
START-SECTOR FOUND in this gadget!
The START SECTOR (1) indicates where your bootloader should load from and
where you wish to write your sectors!
The value in this gadget is typed in DECIMAL numbers, but be WARNED!
If you select the START-SECTOR yourself you can overwrite some diskdata!
4D. TOTAL SECTORS (1) 4.40
-------------------------------------------------------------------------
The TOTAL-SECTORS (1) gadget is calculated automaticly by the
Sector-Trasher, but if you only need a boot loader it can be typed in
manually in DECIMAL numbers! This gadget tells the Bootloader how manny
sectors to load, and it also tells the Sector-Writer how many sector to
write to the disk!!
5. THE LEFT-SIDE GADGETS (LOWER AREA(2)) 5.00
-------------------------------------------------------------------------
The LOWER-LEFT side gadgets indicates where the second loader should
load, jump to and where on the disk it should start reading and how much
it should read! It is only neccesary to fill out this gadget if you
write a DOUBLE BOOT-BLOCK Loader. The SINGLE BOOT-BLOCKER Loader cannot
use these data for anything at all, it is therefor only neccesary to
fill out this block when writing DOUBLE BOOT-BLOCK loaders!!
5A. JUMP ADDRESS (2) 5.10
-------------------------------------------------------------------------
The JUMP-ADDRESS (2) is used to tell the trackloader where to jump to
after loading the secondary program. To enter this address simply press
the gadget and enter your jump address in HEX!
5B. LOAD ADDRESS (2) 5.20
-------------------------------------------------------------------------
The LOAD-ADDRESS (2) tell's the trackloader where the actual sectors
for the secondary should be read to! This address should indicate the
start of your secondary program and is entered in HEX by pressing
the LOAD-ADDRESS (2) gadget!
5C. START SECTOR (2) 5.30
-------------------------------------------------------------------------
The START SECTOR (2) is typed in manually by pressing the START-
SECTOR (2)FOUND gadget!
The START SECTOR (2) indicates where your bootloader should load the
secondary program from and! The value in this gadget is typed in
DECIMAL numbers!
5D. TOTAL SECTORS (2) 5.40
-------------------------------------------------------------------------
The TOTAL-SECTORS (2) gadget is not calculated automaticly like the
TOTAL-SECTORS (1), so therefor you have to write the data yourself!
It is typed in with DECIMAL numbers! This gadget tells the Bootloader
how manny sectors to load for the secondary program!
6. THE MESSAGE WINDOW 6.00
-------------------------------------------------------------------------
The message window is an internal Requester/Information output, here you
will get important messages, status-displays, and error-codes Etc.
The message window is a substitute for the Intuition Library's -
AUTO-REQUESTER, and should be able to give you a helping hand if an error
ocures. The window information will be displayed for aprox 8 seconds,
and will then disapear automaticly.
6A. ERROR MESSAGES. 6.10
-------------------------------------------------------------------------
The 'Error-Messages' is quite important to understand so you can use them
to correct the errors displayed in the window. I will therefore try to
explain as much as possible about the errors listed in the
"Listed Errors" section, so you have a better change to understand
the error type.
ERROR 00.2: Object not found might occur if you try to acces the RAM
disk and the L/RAM.HANDLER is not present on the disk!!!
ERROR 01.0: This errorcode explains itself, to correct it just remove
the write protection and try again.
ERROR 02.0: The device you have tried to select using the drive -
gadgets is either off, or you have no such drive!
Turn on the drive and Reset to use the drive.
ERROR 02.9: This error should only occur if your protection bits is
set so the file is READ-PROTECTED!
Just make it READABLE again!
ERROR 03.0: The disk you are trying to read from is not a DOS disk.
If it is a DOS disk, you might consider to make a -
backup, and then try to install a DOS-BOOTBLOCK on the
backup-disk!
ERROR 04.0: This error occurs if you have not inserted a disk into
the selected drive. Insert a disk and retry!
ERROR 05.0: This errorcode can be quite tricky, the error occures
if you have forgot to:
- SELECT a file to read!
- PRESS the Readfile gadget, to load file into memory!
- PRESSED on another file after reading one!
- ENTER a valid start sector!
ERROR 06.0: This errorcode should only occur when you have forgotten
to read the selected file!
ERROR 07.0: Quite easy, just press both mouse buttons to leave!
ERROR 08.0: If this error occures, please contact me, because it is
an error which I havent seen yet!
Read non listed errors for further information.
ERROR 09.0: The function you have selected has not been implemented to
this version of the program yet, but will be so quite soon!
ERROR 10.0: If you use the BITMAP to write sectors it will try to
find some free space for the file you wish to tracksave,
if it cannot find the wanted sectors this error occures!
ERROR 11.0: When using the BITMAP to write sectors it will try to
find the sectors wanted in a block! If that is not -
possible this error will occur!!
You can correct this bug by using a disk optimizer -
like BAD. BAD will place the sectors together, making
a hole in the bitmap, where you then can write down your
program!
ERROR 11.5: This message will pop up when you have written a boot-
blockloader to your disk! It only informs you that
it has written a bootloader with your informations!
ERROR 12.0: This is just a message to inform the user that the
selected file has now been loaded into the buffer!
ERROR 13.0: Sector trasher has reserved a blok of 260000 Bytes, and
if you try to load a file greather than this amount, you
will get this warning! And the file will not be loaded!
6B. LISTED ERRORS 6.20
-------------------------------------------------------------------------
Sector trasher V1.0B supports the following errors and messages, to read
more about these ERROR's, read the 'ERROR MESSAGES' chapter!
ERR 00.2 - DISK ERROR - THE OBJECT IS NOT FOUND!
ERR 01.0 - DISK ERROR - DISK IS WRITE PROTECTED! (NOT FULLY ACTIVE)
ERR 02.0 - DISK ERROR - DEVICE NOT MOUNTED!
ERR 02.9 - DISK ERROR - FILE IS READ PROTECTED!
ERR 03.0 - DISK ERROR - NOT A DOS DISK!
ERR 04.0 - DISK ERROR - NO DISK IN THE DRIVE (NOT FULLY ACTIVE)
ERR 05.0 - USER MESSAGE - NO FILE LOADED OR INCORECT DATA!
ERR 06.0 - USER MESSAGE - NO FILE SELECTED OR DATA IS INSUFICIANT!
ERR 07.0 - USER MESSAGE - USE BOTH MOUSE BUTTON TO QUIT!
ERR 08.0 - USER MESSAGE - ERROR NOT LISTED YET!
ERR 09.0 - USER MESSAGE - NOT IMPLEMENTED YET!
ERR 10.0 - DISK MESSAGE - NOT ENOUGH FREE SECTORS ON THE DISK!
ERR 11.0 - DISK MESSAGE - WRONG SECTOR LOCATION!
ERR 11.5 - DISK MESSAGE - BOOT HAS BEEN WRITTEN!
ERR 12.0 - DISK MESSAGE - SELECTED FILE HAS BEEN LOADED!
ERR 13.0 - LIMIT MESSAGE - NOT ENOUGH MEMORY TO LOAD FILE!
6C. NON LISTED ERRORS 6.30
-------------------------------------------------------------------------
The ERROR "THE ERROR IS NOT LISTED YET!" might occur, because this
version of Sector-Trasher has not yet got a complete ERROR-CODE list.
If you should happen to find such an ERROR, please contact M&B
Productions with as much information as possible as to how the ERROR
occured. This way we will be able to include the ERROR-CODE in future
versions.
7. COPYRIGHT TERMS. 7.00
-------------------------------------------------------------------------
This Software is protected under international Copyright law (C) ©
It may be distributed on Shareware basis as long as the following
conditions are met:
* No fee may be charged! Except if a written contract with M&B
Productions exists.
* It is prohibited to make any kind of changes on the software!
* All files (Including this Doc-file) MUST be copied along with
the main software.
Faliure to meet these conditions are liable to Criminal Prosecution.
(C) Copyright 1992, Master / Bionic Productions (M&B Productions).
All Rights Reserved.
If you use this product frequently, Please consider sending a donation
to the develloper of this product.
Master / Bionic Productions are NOT responsible for ANY damage
caused by this software to your Hard/Software.
If you have any questions do not hesitate to write, we will gladly try
to answer the questions you might have.
7A. SUPPORT US. 7.10
-------------------------------------------------------------------------
If you like this little tool and would like to support us, please
consider sending a donation in us dollers to our address. Danes should
however send dk kroners.
7B. CONTACT ADDRESS 7.20
-------------------------------------------------------------------------
To contact the auther of this product for any reason, then write to the
address below. If you can think of any ideas for improving this tool
drop me a few lines stating what the changes should be!
SILENTS
POSTE RESTANTE
8800 VIBORG
DENMARK
ATT: M&B PRODUCTIONS